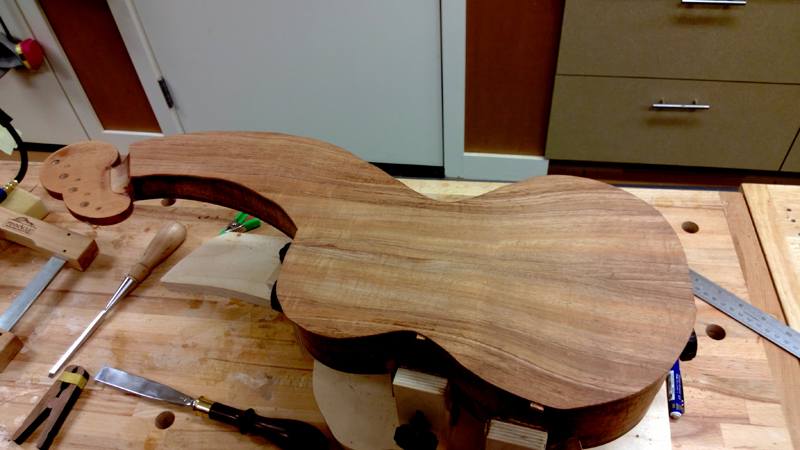
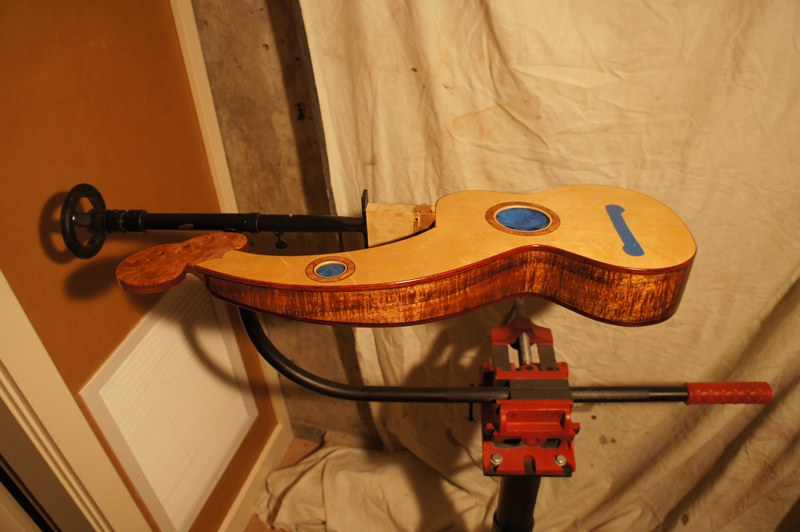
I have it back in the finishing room. I cleaned everything up drop filled with CA where needed and applied Z-Poxy to the sides and the back.
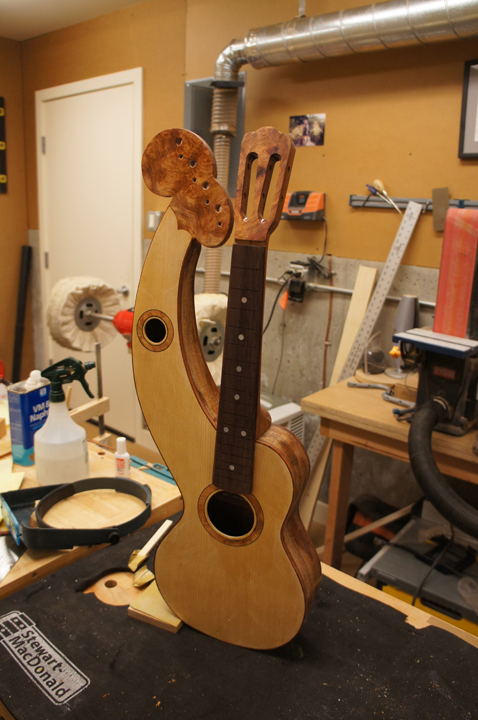
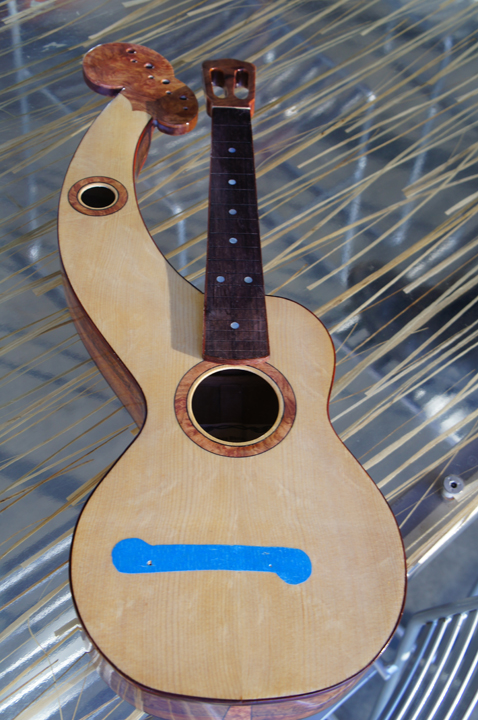
I should able able to spray starting this weekend. I also included a picture of the Uk assembled. Who could see the obvious non cosmetic mistake?
I will probably leave it but if I am really bothered I could fix it as well.
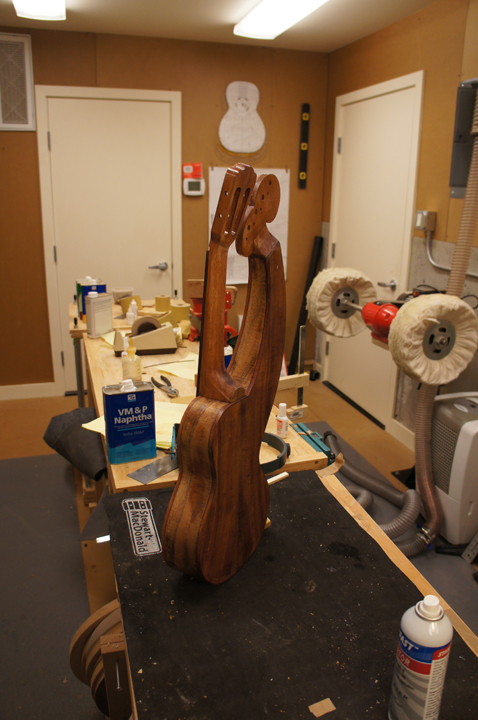
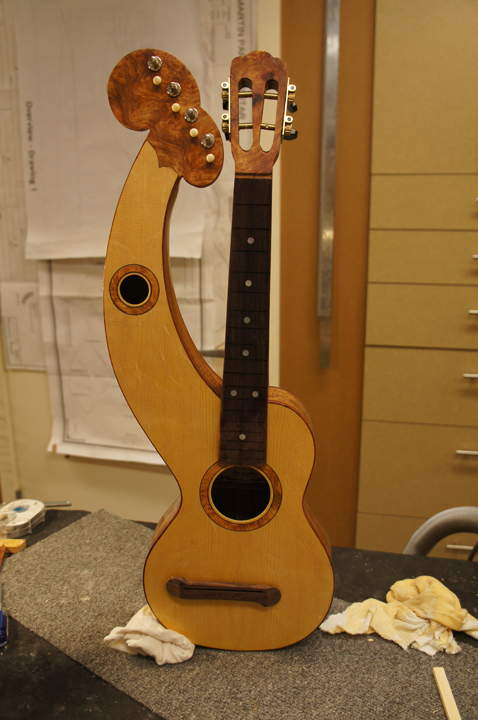
I decided to just leave well enough alone and leave the dot on the sixteenth. If someone is playing the high on the neck they can figure out one fret from the other. I finally got the first coat of lacquer on the instrument. I had to finish all of the little detailed prep work. It took a lot of effort to prep all of the little corners and curves and what not especially around the harp peg head. Before doing the final prep I also assembled (photos included :)) the instrument and set the bridge location and double checked the neck angle. All looks good. I should be able to buff it out in a couple of weeks from this time.
With first coat of lacquer
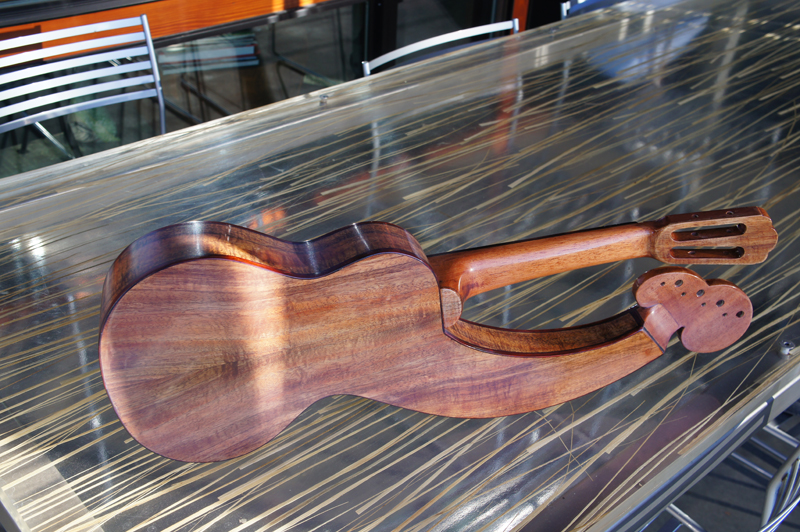
Test assembly before final prep.
October 2nd 2012
I went away to the mountains for a month no internet, not even cell. My wife and I dropped our youngest off at college and instead of going home to an empty nest ...
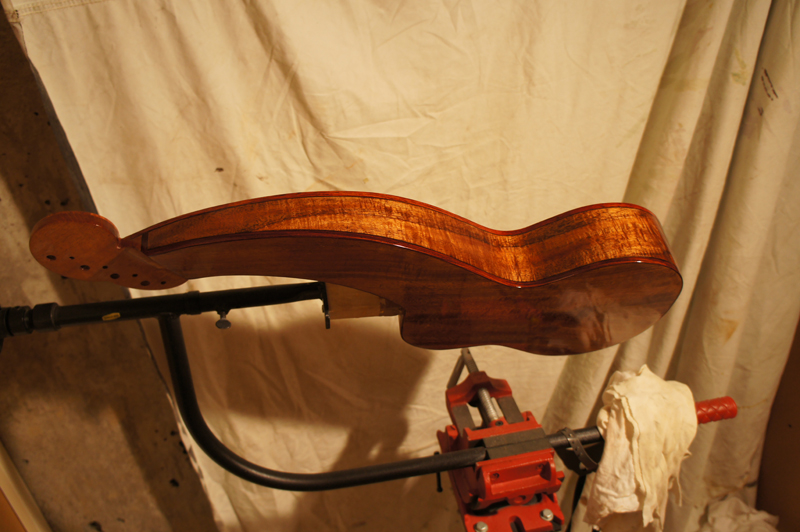
But I digress, I came home and I am not happy with my application of EM7000 it is very blue. Maybe my coats were too thick I am not sure. I also had adhesion problems when I tried to buff out before the trip. (See the first picture). Right before the trip I sanded down the damaged are and resprayed. You can see in the pictures.
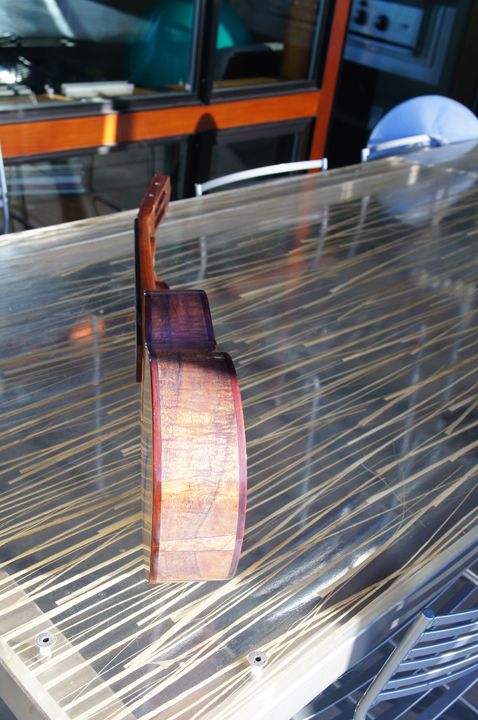
Here is what the instrument looks like in sunlight. It looks ok in warm light. I will sand it down and refinish.
I waited long enough to update this build log. Those that have followed my post will note that after spray with EM7000 the instrument was way to blue. Not a tint but a very muddy blue finish. I usually try to follow a rule that when things go wrong put the tools down to think things through. I was so frustrated I went after the finish with an orbital sander. Not so bad while I was using 600 grit paper but a gin and tonic at dinner 200 grit sandpaper on the sander. Well, one can imagine. I ended up sanding a small section of the harp neck almost paper thin. Luckily I did not sand a hole in the side. I removed the back, in one piece, but thought that it was also bit thinner than I wanted. Not really bad, but luckily I had a koa back set without sides that was a very good match.
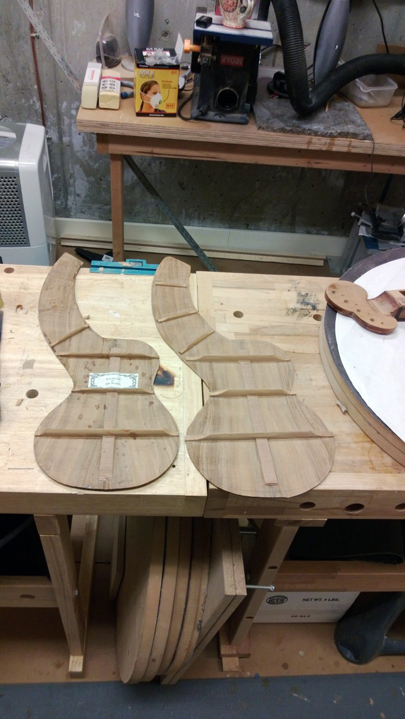
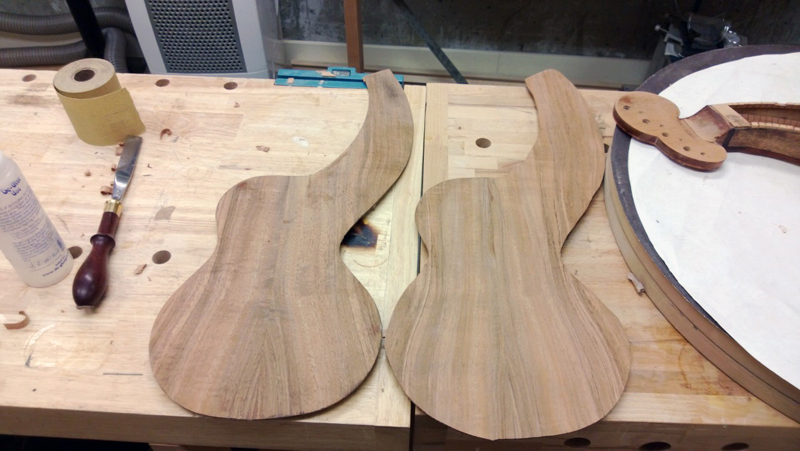
So after following my rule of putting the tools down, and resisting the urge to trash the instrument. I decided to glue a bit of veneer in the area where the side was thin and to build the new back. I also learned that a better way to remove WB lacquer is to use denatured alcohol and a scraper. I soaked a rag in the alcohol and placed it on an area of finish. This softened the lacquer and allowed me to remove it without removing wood.
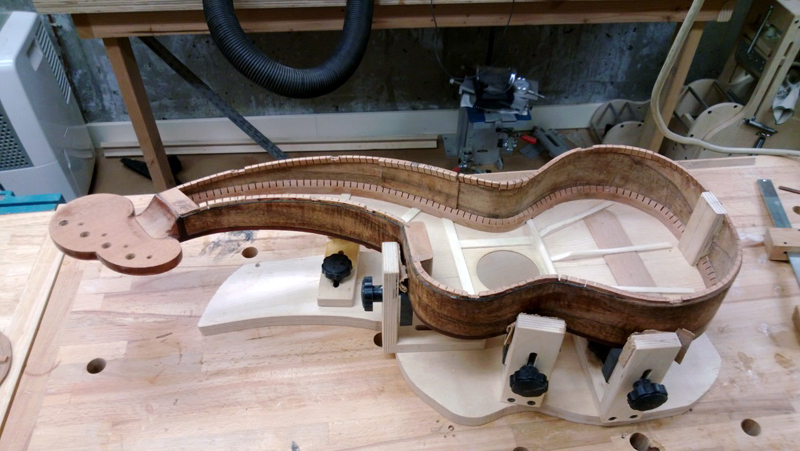
I am just starting to put the whole thing back together. Hopefully this time it will turn out OK. I will use EM6000 to finish it the second time. The error on the EM7000 was probably mine. It builds much faster than the EM6000. Also care must be taken not to spray it thick. The EM6000 seems way more forgiving.
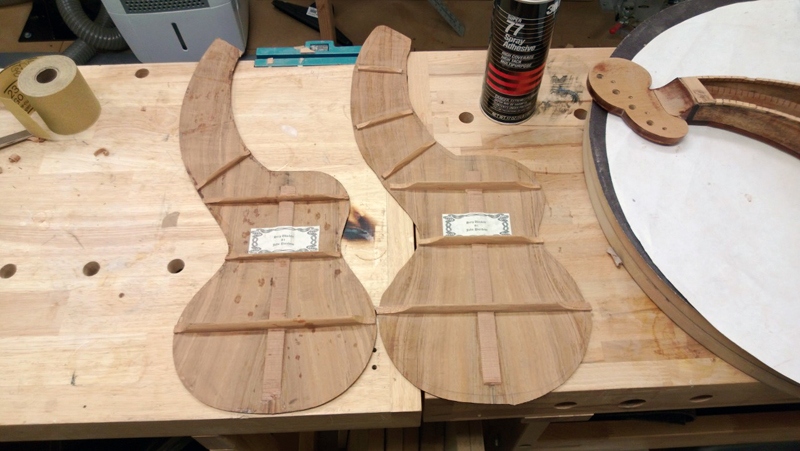
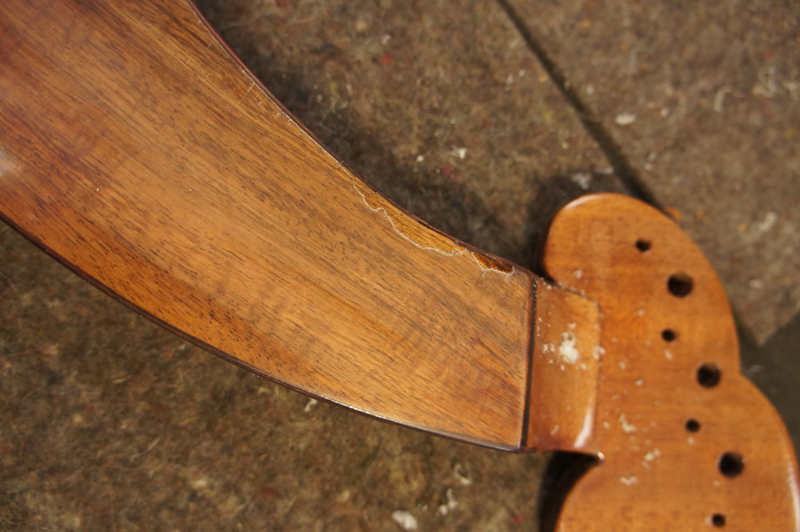
Here are some pictures about where I am. In the first picture you can see the patch.

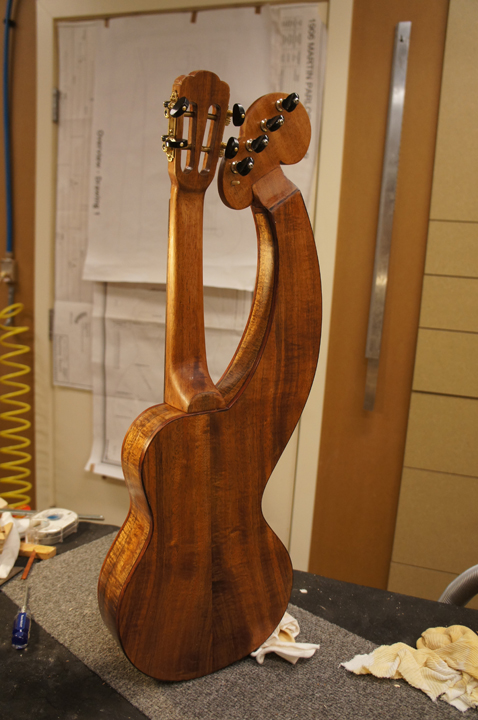
 Test assembly before final prep.

 I waited long enough to update this build log. Those that have followed my post will note that after spray with EM7000 the instrument was way to blue. Not a tint but a very muddy blue finish. I usually try to follow a rule that when things go wrong put the tools down to think things through. I was so frustrated I went after the finish with an orbital sander. Not so bad while I was using 600 grit paper but a gin and tonic at dinner 200 grit sandpaper on the sander. Well, one can imagine. I ended up sanding a small section of the harp neck almost paper thin. Luckily I did not sand a hole in the side. I removed the back, in one piece, but thought that it was also bit thinner than I wanted. Not really bad, but luckily I had a koa back set without sides that was a very good match.
So after following my rule of putting the tools down, and resisting the urge to trash the instrument. I decided to glue a bit of veneer in the area where the side was thin and to build the new back. I also learned that a better way to remove WB lacquer is to use denatured alcohol and a scraper. I soaked a rag in the alcohol and placed it on an area of finish. This softened the lacquer and allowed me to remove it without removing wood.
I am just starting to put the whole thing back together. Hopefully this time it will turn out OK. I will use EM6000 to finish it the second time. The error on the EM7000 was probably mine. It builds much faster than the EM6000. Also care must be taken not to spray it thick. The EM6000 seems way more forgiving.
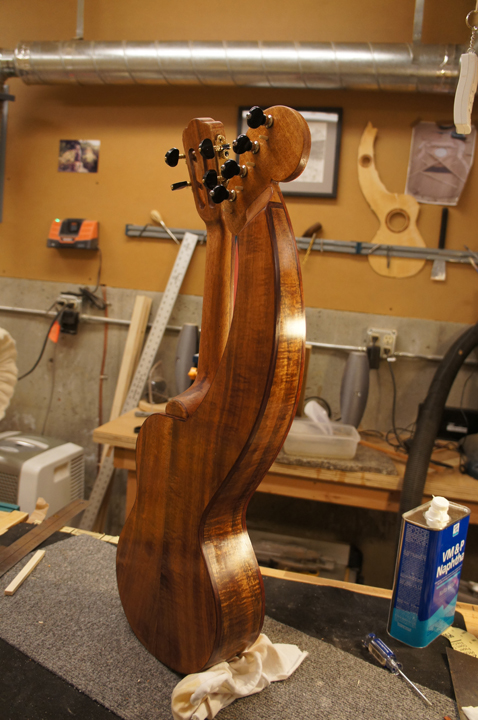
Here are some pictures about where I am. In the first picture you can see the patch.
I waited long enough to update this build log. Those that have followed my post will note that after spray with EM7000 the instrument was way to blue. Not a tint but a very muddy blue finish. I usually try to follow a rule that when things go wrong put the tools down to think things through. I was so frustrated I went after the finish with an orbital sander. Not so bad while I was using 600 grit paper but a gin and tonic at dinner 200 grit sandpaper on the sander. Well, one can imagine. I ended up sanding a small section of the harp neck almost paper thin. Luckily I did not sand a hole in the side. I removed the back, in one piece, but thought that it was also bit thinner than I wanted. Not really bad, but luckily I had a koa back set without sides that was a very good match.
So after following my rule of putting the tools down, and resisting the urge to trash the instrument. I decided to glue a bit of veneer in the area where the side was thin and to build the new back. I also learned that a better way to remove WB lacquer is to use denatured alcohol and a scraper. I soaked a rag in the alcohol and placed it on an area of finish. This softened the lacquer and allowed me to remove it without removing wood.
I am just starting to put the whole thing back together. Hopefully this time it will turn out OK. I will use EM6000 to finish it the second time. The error on the EM7000 was probably mine. It builds much faster than the EM6000. Also care must be taken not to spray it thick. The EM6000 seems way more forgiving.
Here are some pictures about where I am. In the first picture you can see the patch.